
I was out under the deck
waking up the patio area.
Here is what it looked like before:

Pretty Boring!
So Mr. Beaux and I mapped out a plan for what
we wanted to do in the space.
Allright, I told him what "I" wanted in the space and he nodded his head a lot while some kind of sports were on the TV. Then I said "Are you ready to go to Lowe's?"
Yes! That got his attention. Off we went.
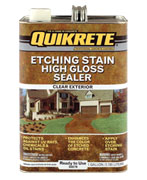
I wanted to stain the concrete but wasn't sure if we could pull it off without having a professional do it. We looked at all of our options and settled on a Quickrete product
(it came with a video).
It's pretty pricey at $75.00 a pop.
You need to buy the sealer too, which is also $75.00.

Crossing my fingers I started the project after watching the video a few times. First, I power washed the concrete really well. I started in the afternoon after painting the chairs and cleaning the cushions so I waited until the next day to start the Etching process.
It was super hot this week.
107 degrees on one of the days
so I started early in the morning.

I hosed down the concrete so that it was wet but not puddly. I taped up the columns and the lower half of the house. Here is a tip. Put plastic over the bottom half of the area to protect it. I ended up doing some touch up painting after I was finished.

I put the Etching Stain in a garden sprayer and sprayed the concrete in a circular motion.
Make sure you wear shoes, long pants, gloves and eyewear just in case. This is dangerous stuff!

This is what it looked like as soon as I sprayed it.
It's turns a yellowish color while the Etching is taking place. You can see that it is already working in some places.

You have to wait four hours for it to work completely and then scrub it with a small amount of Baking Soda and water and then Wet Vac up the residue before sealing the concrete. This was the tedious part.

When it dries it looks a little lackluster and hazy. It scared me because I wasn't sure if it was going to turn out or not. On the left is where I started to apply the Gloss Sealer.

And, after two coats of sealer it's all finished.

It's different in each area which makes it really cool. I am very proud of myself that I completed the whole project by myself too!

OK, I think it's starting to come Alive!
I have a few more plans for this space so stay tuned!
Until Next Time,
Beaux R'eves,
XO Cindy
Susan at Between Naps on the Porchfor Metamorphosis Monday
Not Just a Housewife
Marty at A Stroll Thru Life for Tabletop Tuesday
Not Just a Housewife
Marty at A Stroll Thru Life for Tabletop Tuesday
Roeshel at DIY Showoff
Kristin at My Uncommon Slice of Suburbia for Tuesday's Treasures
Linda at Coastal Charmfor Nifty Thrifty Tuesday
Faded Charm for White Wednesday
Kim at Savvy Southern Style for Wow Us Wednesdays
Judy at DIY by Design
Linda at Coastal Charmfor Nifty Thrifty Tuesday
Faded Charm for White Wednesday
Kim at Savvy Southern Style for Wow Us Wednesdays
Judy at DIY by Design
The Brambleberry Cottage
Gina at The Shabby Creek Cottage for Transformation Thursdays
Sherry at No Minimalist Here for the Open House Party on Thursdays
Gina at The Shabby Creek Cottage for Transformation Thursdays
Sherry at No Minimalist Here for the Open House Party on Thursdays
From My Front Porch To Yours for Treasure Hunt Thursday
Poutpourri Friday at 2805
Cindy at My Romantic Homefor Show and Tell Friday
Courtney at French Country Cottage for Feathered Nest Friday
Heather and Vanessa at At the Picket Fence for Inspiration Friday
Diann at The Thrifty Groove for Thrifty Things Friday
Debra at Common Ground for Vintage Inspiration Friday
Sherry at The Charm of Home for Home Sweet Home Friday
Jen at Tatertots and Jellofor the Weekend Wrap-up Party
Donna at Funky Junk Interiors for Saturday Nite Special
Five Days...5Ways
Stone Gable~Tutorials,Tips,and Tidbits
0 comments:
Post a Comment